Reporting options for client activity
Back to Family Viewing overview
Practitioners can run various reports for clients they are connected to on OurFamilyWizard. Use the following tutorials to learn how to run the major reports available through your OurFamilyWizard Practitioner Account.
In this tutorial:
Login histories
Login history reports are available for every parent and child in families to which you have been granted professional access. Reports for parents to whom you have access will also include IP Address information for each session. If you have not been granted access by the other parent in the family, their report will only include dates and times for each session.
- Enter Client View Mode from My Cases.
- From the drop-down navigation menu, click History. You'll be brought to a sign-in history page where you'll see the last sign-in details for each account associated with the family.
- From the drop-down menu located below the last sign-in information, select the account for which you'd like to generate a sign-in history report. Click Create Report.
- A preview of the report will open. Click Print to download a copy of the report to your device.
Journal reports

Journal reports make it easy for you to export Check-ins and Moments from a client's account. Journal reports will show all of the most important details within journal entries including when it was created, information about tagged locations, and much more.
There are two ways to create a journal report: using the 'Generate Report' tool or by selecting individual entries to print from the main Journal navigation.
Generate Report tool
- Enter Client View Mode from My Cases.
- From the drop-down navigation menu, click Journal.
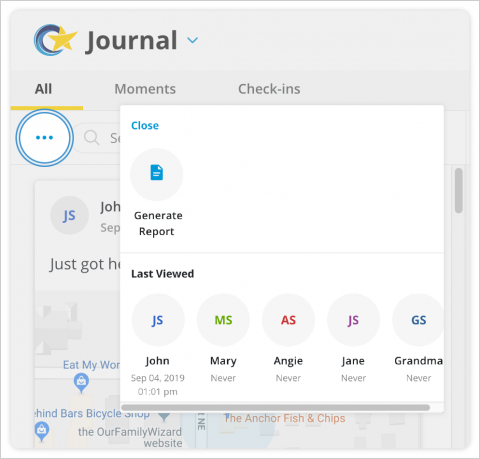
- Click the three dots located to the left of the search bar and select 'Generate Report' from the window that pops up.
- Choose the filters you'd like for your report. When ready, click 'Generate Report.' You'll see a confirmation message that your report was successfully generated.
- Exit Client View Mode, navigate to your Messages and look in your Notifications folder for a new message titled "Report Generated."
- Click the link inside the message to open the report.
Printing from Journal feed
- Enter Client View Mode from My Cases.
- From the drop-down navigation menu, click Journal. You'll be brought to the main Journal page where you can search for the entry or entries that you wish to include in your report. The filter and keyword search functions can help you to quickly locate entries.
- To select entries to include in your report, click them from the column on the left side of the page.
- If you wish to print just one entry, click it from the list of entries in the left column. It will be highlighted in blue once selected.
- If you wish to print multiple entries, hold the Command key on your keyboard, then click each of the entries you wish to include in your report. They will each be highlighted in blue once selected.
- Click the Print icon. A pop-up window will appear to confirm that your report was successfully generated.
- Exit Client View Mode, navigate to your Messages and look in your Notifications folder for a new message titled "Report Generated."
- Click the link inside the message to open the report.
Schedule change request reports

Schedule change request reports give you a detailed account of all parenting time modification requests, including reasons provided for the requests, dates and times, and responses.
- Enter Client View Mode from My Cases
- From the drop-down navigation menu, click Calendar.
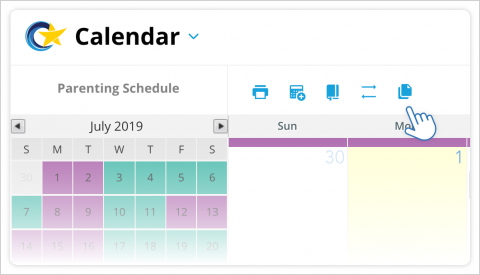
- Click the Swap report button located in the bar above the calendar.
- In the schedule change request window, select the timeframe you would like for the report and click Get Report.
- A preview of the report will be generated. You can change the dates at this time if you are not seeing the information you would like included in the report.
- Click Print to download a copy of the report to your device.

Message reports
Follow these steps to print selected messages or all of the correspondence from a client's account.
- Enter Client View Mode from My Cases.
- From the drop-down navigation menu, click Messages.
- In the left-hand menu, select the folder you wish to print from. If you wish to print all of a client's sent and received messages, select the All Messages folder.
- To print one or more selected messages, use the checkboxes to the left of each message to select the ones you'd like to include in your report. Your report must include at least one message, but you can select as many as you'd like. To print all of the messages in the folder, you do not need to use these checkboxes and can proceed to the next step immediately.
- Click the Print icon at the top of the page.
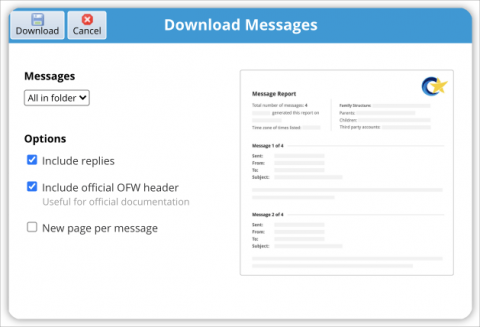
- In the Download Messages window, you will see the following options for customizing your report:
- Messages: Select whether you’d like to only print the message(s) you have selected or all messages within the folder you are viewing.
- Options: Check the following boxes if you would like to:
- Include replies made to any messages in your download
- Include an official OurFamilyWizard header to the top of your download
- Display only one message per page in your download
- Click Download.
- If you are printing just a few messages, they will download immediately. Follow the prompts from your internet browser to save the PDF download and print your report.
- If you are printing a very large number of messages, you will be presented with two options: wait on this page for the download to complete or continue working within your account and find the download available later within a new message in your own Notifications folder.
- If you chose to continue working and will find your report later, you'll need to go back to viewing your own account.
- Navigate there by clicking the Select User drop-down menu in the upper-left corner of the blue bar at the top of your screen.
- Click Exit Client Viewing to return to viewing your own account.
- Click the drop-down navigation menu and select Messages.
- Select your Notifications folder and look for a new message titled Report Generated. Open this message and click the link to access your report.
- Follow the prompts from your internet browser to save your message report as a PDF or to print.
Related help topics